

My good friend Elisha helped me out with a haircut tutorial a while back for St. Louis Family Magazine. If you’re curious, head over to check it out! Thanks to the ever-talented Elisha, Emil’s haircut is growing out so nicely!
Category: DIY Fun
Montessori-Inspired
DIY Fun, by lauren, July 3, 2014, 1 Reply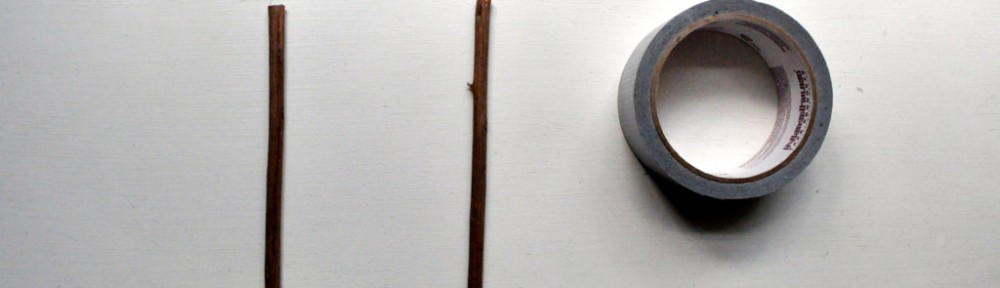
Magnetic experiments are some of my boys’ favorite activities. This time, I decided to hide a bunch of items in some sand, make some magnetic wands, and let them try to fish out the magnetic objects. So they knew how many items to retrieve, I placed squares on a piece of paper (one paper was … Continue reading “Montessori-Inspired”
Montessori-Inspired
DIY Fun, by lauren, June 26, 2014, 2 Replies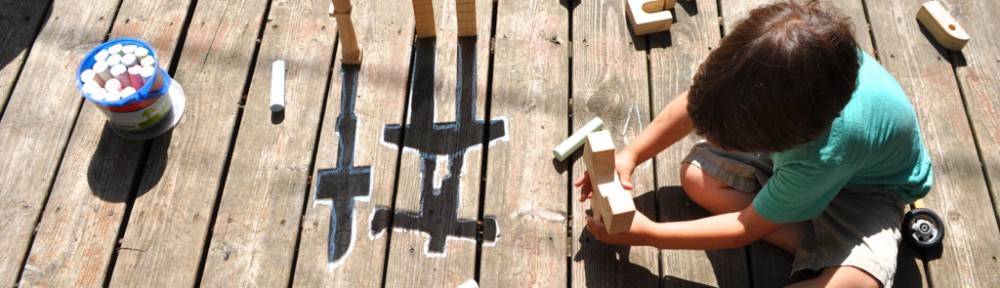
On a bright and sunny day, Oliver wanted to trace shadows. This time he built structures nice and early in the morning, when the shadows are long, then he traced them. He made some pretty cool things! We left the structures in the same position all day and enjoyed checking on them to see how … Continue reading “Montessori-Inspired”
CrumbBums Summer Fun Round-Up!
DIY Fun, by lauren, May 30, 2014, 13 Replies
This summer, we have no camp, no scheduled activities, and no childcare. It’s about to get interesting! But I’m not all that stressed (yet). Here is a list of 20 things we plan on doing here at home and around the fantastic city of St. Louis. 1. Our top summer at-home activity? Giant Ice Cube … Continue reading “CrumbBums Summer Fun Round-Up!”
Mummy
DIY Fun, by lauren, March 7, 2014, 8 Replies
Sometimes our dog Proudie likes to scratch at the bedding before she nestles down to sleep. It drives me absolutely bonkers because I know that she is breaking down the fabric and it will eventually tear… that, and the fact that there is a dog under the covers. I am of the belief that dogs … Continue reading “Mummy”